
In this article, I will focus on how to register new plugins in an existing assembly. If you have just written the first plugin in a new assembly, please follow the instructions from step 4 in this post instead.
So to register a new plugin you’ve written in your existing assembly (which I assume has compiled without errors of course), you simply fire up your Plugin Registration tool. As mentioned several times before, I prefer to use the one in the XmlToolbox.
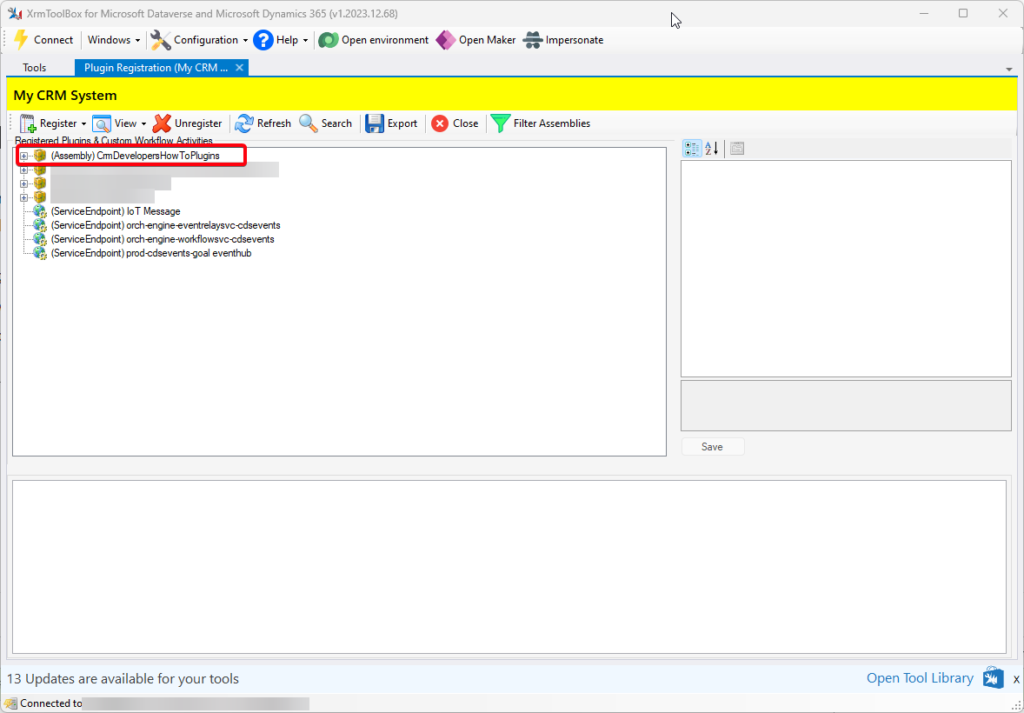
In the screen shot above, I have already connected to my CRM instance, and you will also notice that I have clicked the “Filter Assemblies” button and checked “Hide managed assemblies”.
The plugin I registered earlier in the “Creating and registering your first plugin” post is still there, but I have changed the name from “MyFirstCRMPlugin” to “CrmDevelopersHotToPlugins”. That is so that it reflects the fact that the plugins are indeed connected to this CRM Developer’s How-To website, and also to “allow” me to put more than one plugin in the same assembly. There is of course no restrictions, but the name “MyFirstCRMPlugin” kind of gave the impression that there was only one plugin in the assembly, and to put more than one plugin in that assembly could confuse people and question the logic behind it…
Anyway, renaming an assembly is of course not as simple as merely changing the name. You need to change it in all relevant places in the Visual Studio project, compile a new assembly, unregister the old assembly and register the new assembly. AND re-register all steps and images that might have been registered before.
That is why I tried to stress in the first post that you should really select a suitable name for your plugin assembly at the time of creation!
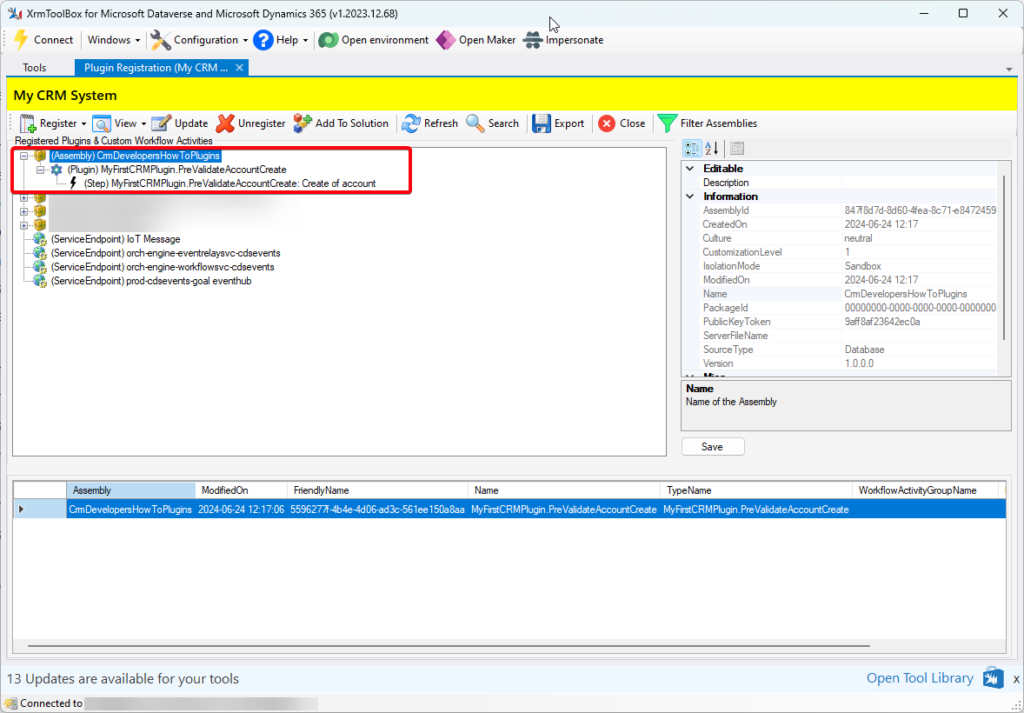
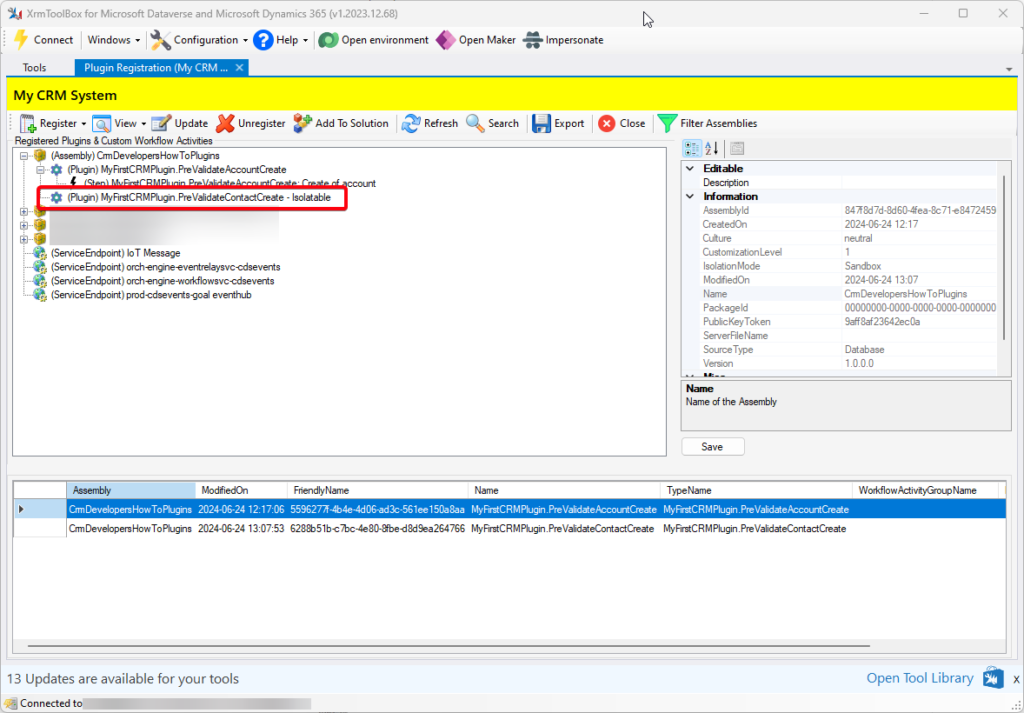
Expanding the nodes will show that our first plugin and the registered step still exists in the assembly:
Anyway, I have created a new plugin class in my assembly and called it PreValidateContactCreate.cs. It is meant to be run when a Contact entity is created, similarly to the first plugin which was run when an Account entity was created.
To register it, I simply click and highlight our assembly name, “CrmDevelopersHowToPlugins”. I then click the “Update” button in the tool menu strip (or I can right click the assembly name and select “Update” from the context drop down menu).
Be VERY careful: The “Update” button is right next to the “Unregister” button, and if you mistakenly unregisters your assembly, you will not only need to re-register the assembly, but also all of the steps and images as previously mentioned. And they are not registered anywhere…
In Step 1, you select your compiled assemby, just like before:
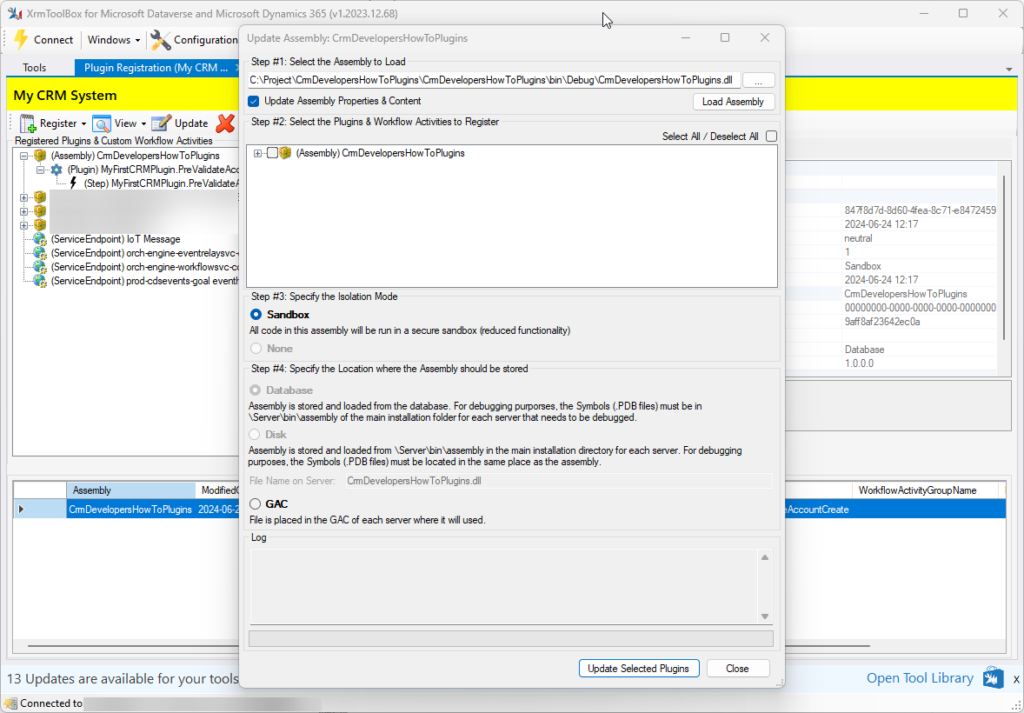
Once the assembly has been loaded, you will notice that the checkbox next to the assembly name is empty. And if you click the “+” sign to the left to expand the node, you will see our new plugin listed, also unchecked. The plugin we registered before is also there, but it’s checked.
If you click the Update button at the bottom now, only the already registered plugin will be updated.
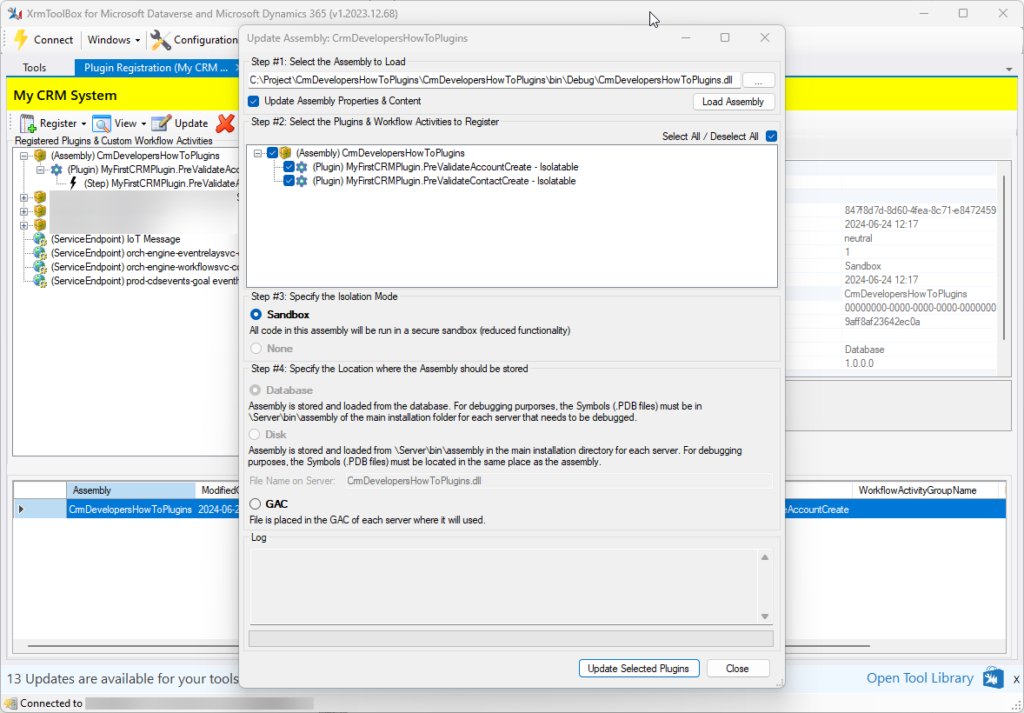
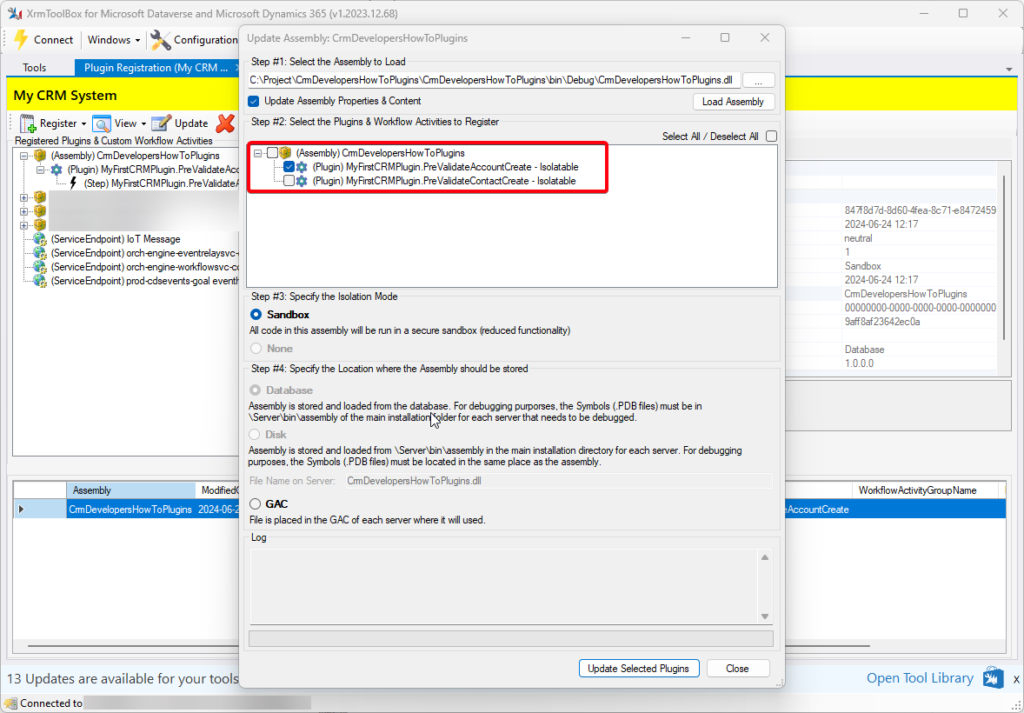
So you need to check all plugins that should be registered (in our case only one), and when that is done, you can click the “Update” button.
Our new plugin will appear in the list:
Last step but one is to right click it and register the appropriate plugin step:
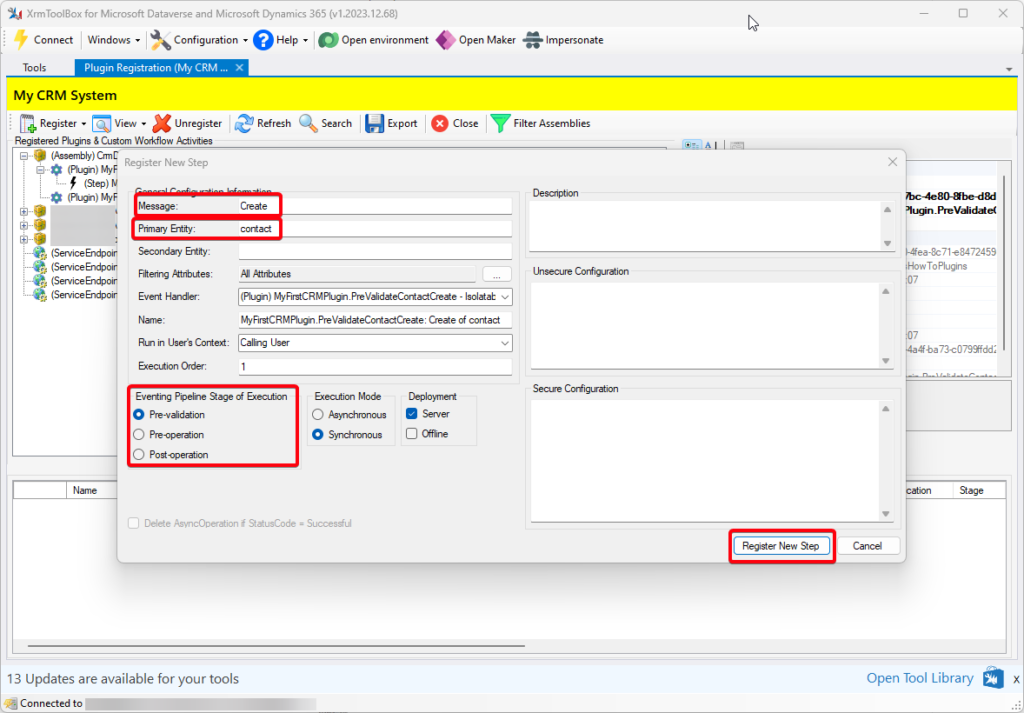
You can click “No” for now when it asks you to specify explicit attributes. I will talk about that in a later post.
If you don’t remember what the selections we chose do, please refer to the first plugin post linked in the text above and to the right of the post.
OBSERVE: If you have your own CRM solution in which you keep your changes (which you SHOULD have to facilitate deployment of your customizations), you should add the assembly AND the plugin steps to your solution. I will explain more about that in a separate post!