
For many years now, you have had the possibility to export data from Dynamics 365 CRM using Word templates. It could for instance be a quote you need to send to your customer, and that is the example I will use in this article.
Let’s assume you already have an existing Word template created for quotes. The you update the quote entity with a new field you want to show in the created document. However, the field is not available to the template that you have.
In order to access the new field(s), you follow the steps below to generate a new Quote entity XML file:
1.
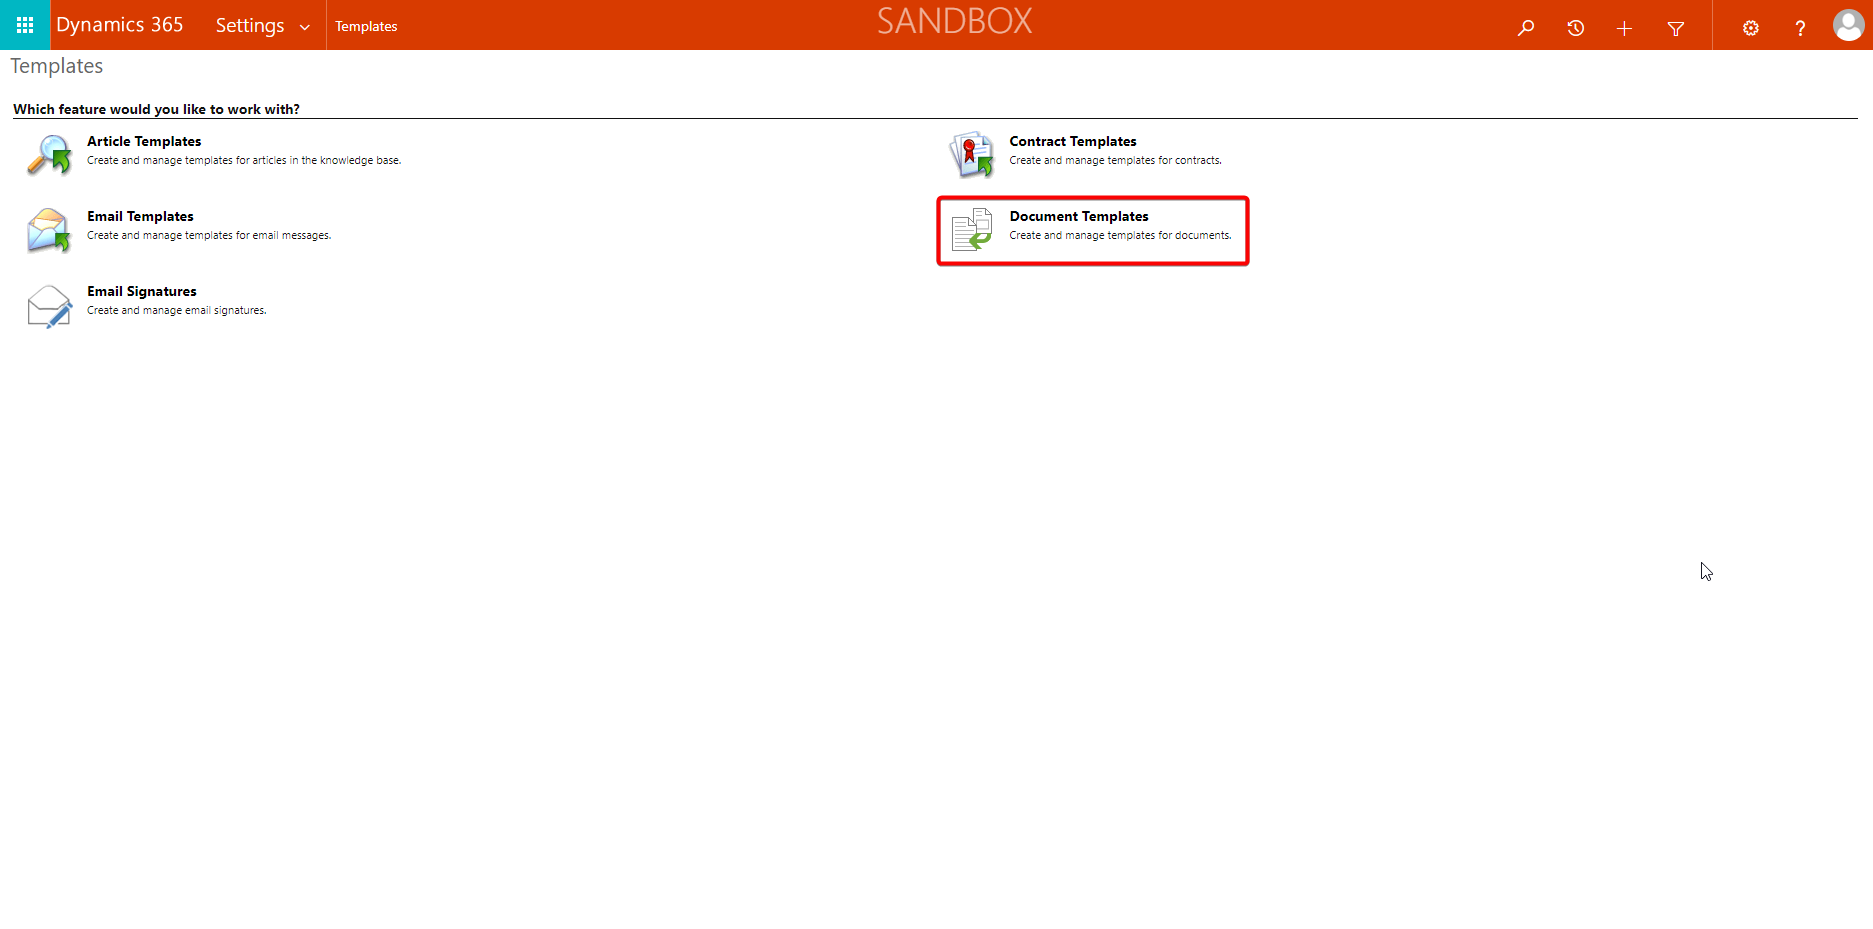
Open your Dynamics 365 CRM system and go to Settings | Templates | Document Templates.
2.
Click +New to create a new Word template.
3.
Select Word Template. and then select the entity you want to you in the template, in out case the Quote entity. This should be the same entity that was used in the original template.

Click Select Entity.
3. Select the related entities you will want to include in the template (if any):
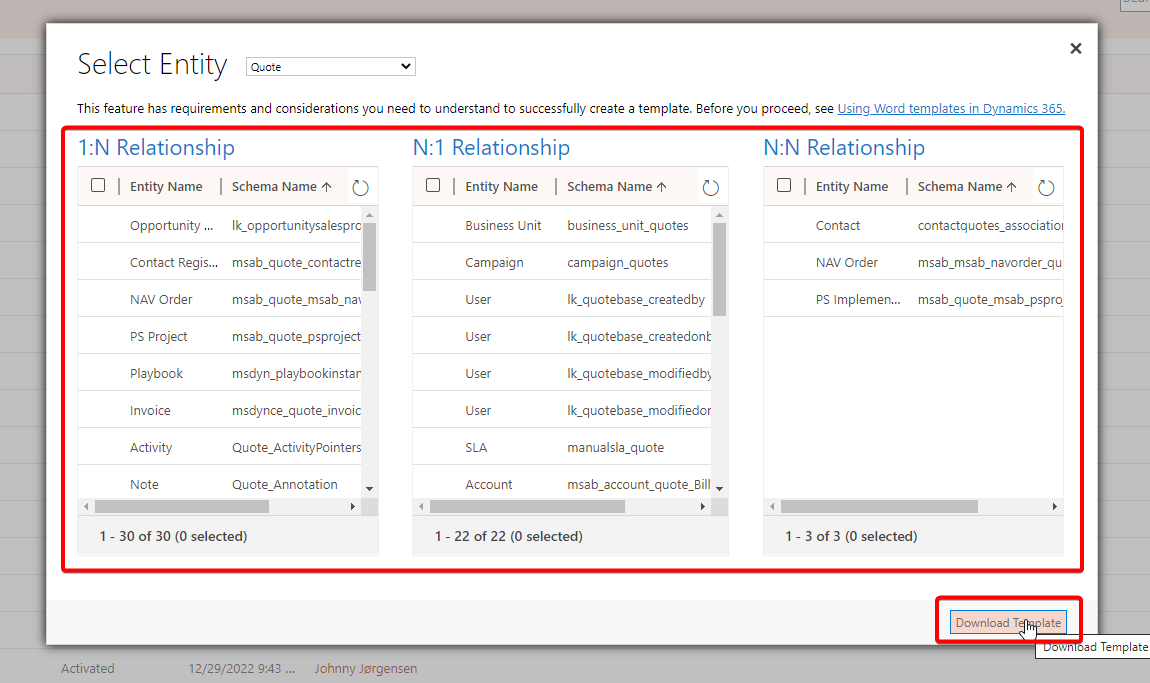
Click Download Template. It will be downloaded to your local Downloads folder.
4.
Open Windows Explorer and navigate to the downloaded file. The file name will be something like Quote 2-3-2023 11-13-24 AM.docx.
Change the extension from “docx” to “zip” and click OK if Windows warns you that it could damage the file. It won’t!
5.
Right click the zip-file and select Extract all. Or use 7-Zip or WinZip to extract the files if you prefer.
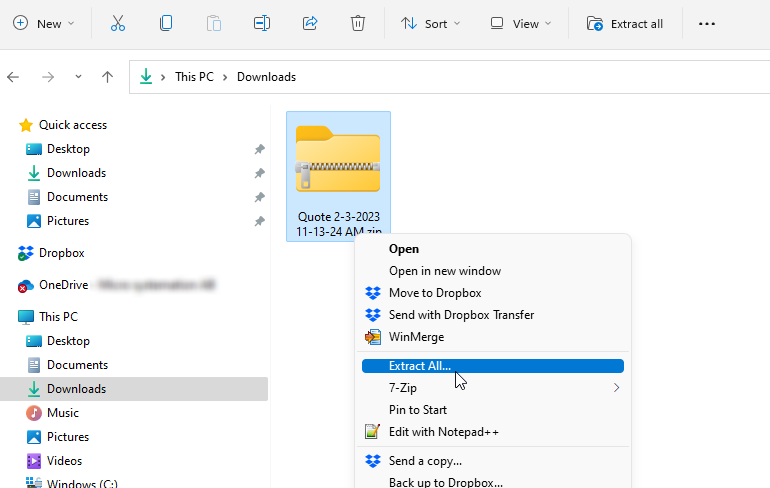
You will get the option to chose where you want to extract the files. The default suggestion is a subfolder in the downloads folder. That should work just fine, but you decide.
6.
In the folders of the unzipped file, you will have a folder called customXML, and in that folder should be a file called item.xml.
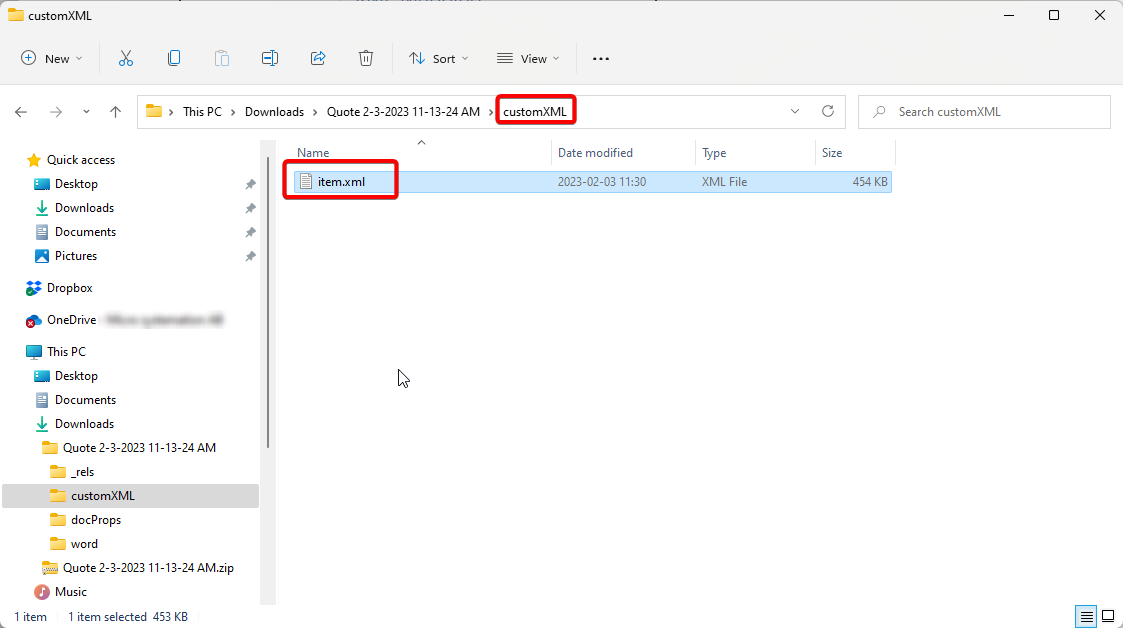
This is the file you will need to continue. I would rename it to something else, for instance the entity name, quote.xml, perhaps add some kind of version number or date, and put it somewhere else where I knew where it was and could keep it for future use. But that’s entirely up to you, of course.
Anyway, If you have moved to file to a safe place, you can delete the rest of the unzipped content and the zip file itself. We don’t need that anymore.
7.
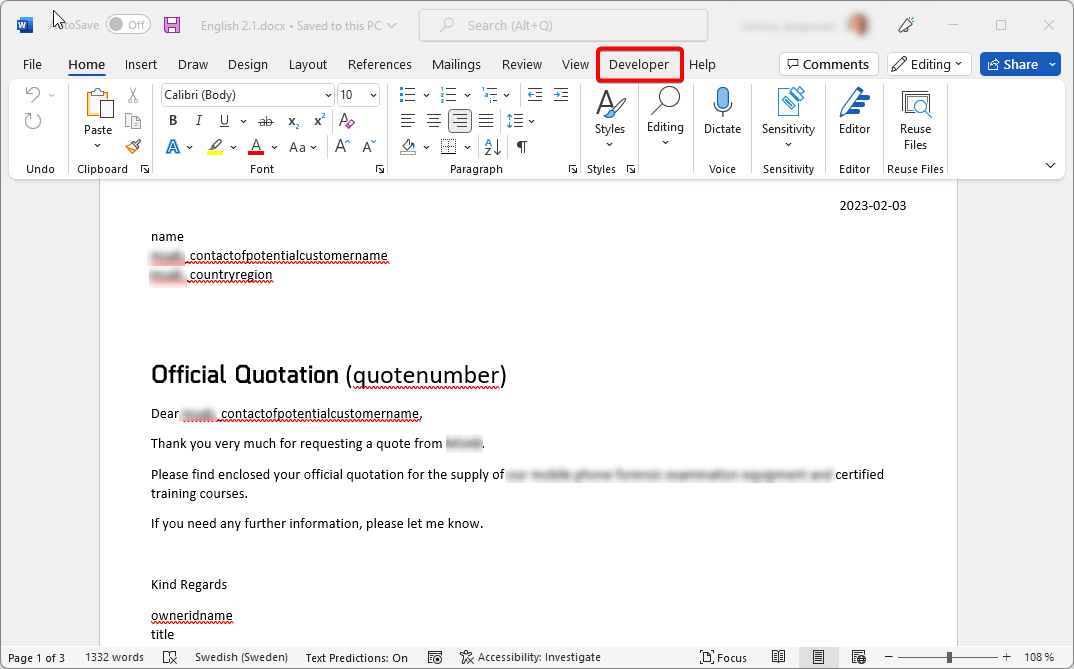
Now comes the FUN part! Open the template you want to edit in Word. FINALLY!
8.
You’ll need to have the Developer tab available, so if you haven’t already, enable it like this:
In Word, go to File | Options | Customize Ribbon
Check the box next to Developer:

Click OK. The Developer tab should now be available:
9.
Open the Developer tab and click the XML Mapping Pane button in the Mapping section.
You will see a drop down box marked Custom XML Part on the right hand side, and in that drop down list, there should be an entry called something with Microsoft, CRM and the entity name (in our case Quote).
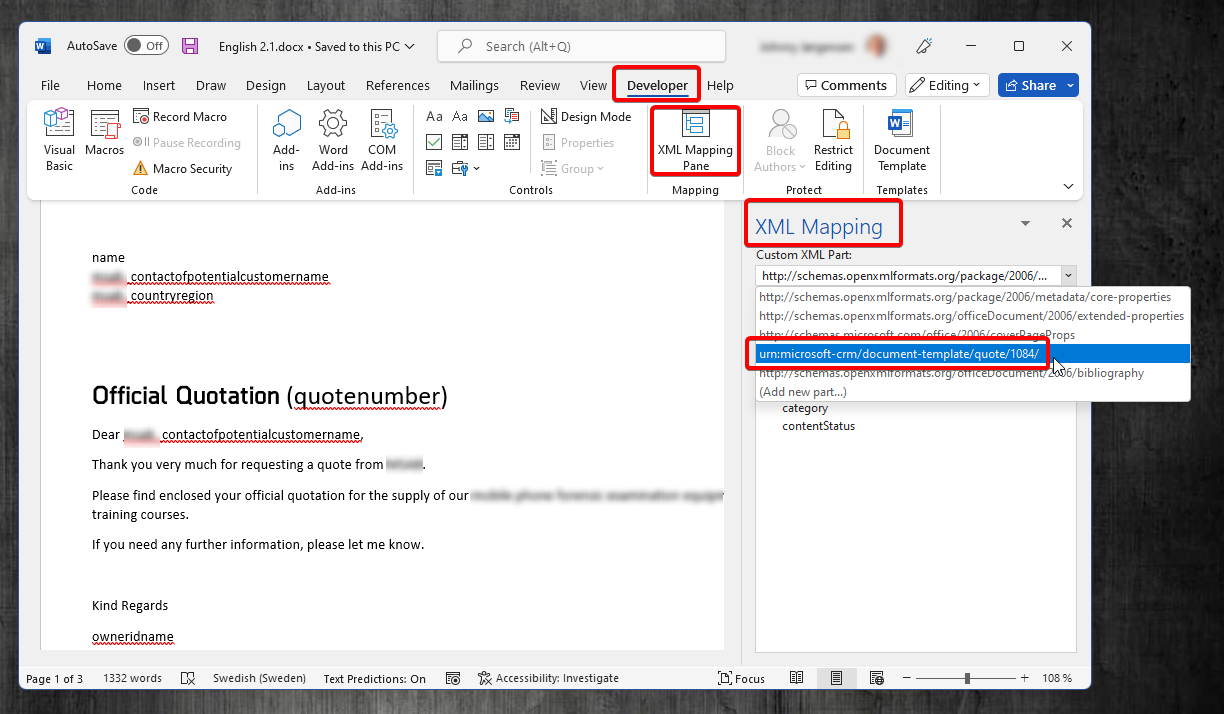
This is the XML your template is based on, and it is from here the fields that are on the template has been added.
To get access to the new fields, we need to add the new XML file we created earlier.
We can’t update or delete the old one, so we will have to add the new one using the last option in the drop down list: (Add new part…).
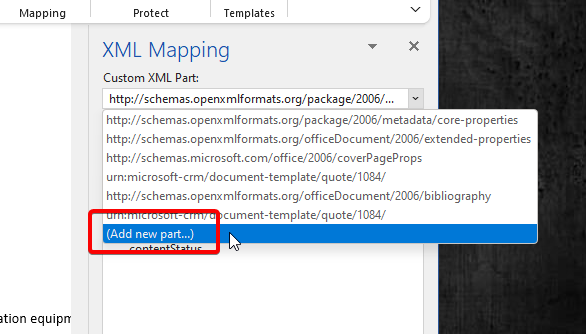
That will open an Open file dialog. Browse to and select the xml file you retrieved in step 6, no matter if it now called item.xml, quote.xml or something entirely different.
After you have clicked OK, you should have a new entry in the drop down:
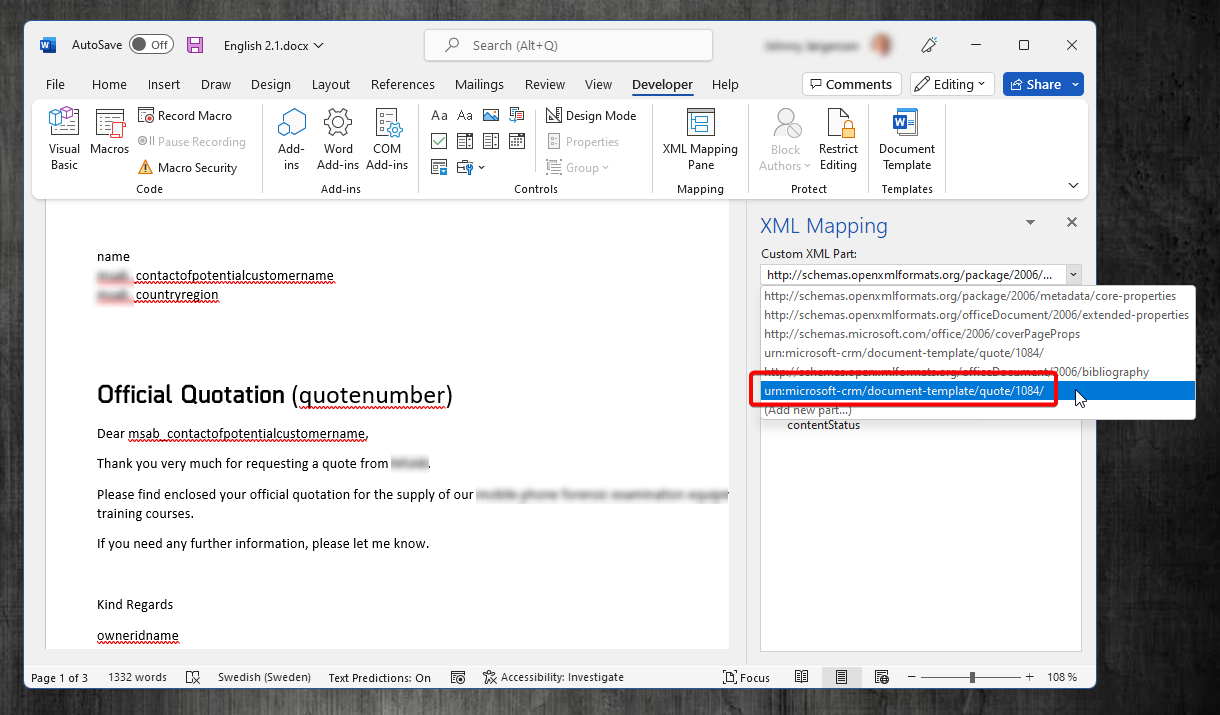
You will noticed that the “old” entry remains in the list, and you now have two entries with the same name. That is as it should be.
10.
Now you can make your changes to the template and add the new field(s). Don’t forget to save afterwards.
11.
Upload the new template to Dynamics 365 CRM.
PROBLEM SOLVED!