
You can get a long way using Dynamics 365 CRM’s built-in functionality, but every once in while there may be special cases where it just doesn’t cut it.
Then it’s good to know that you can embed Web Resources in the Entity page UI where you can built extra functionality using html and javascript.
You can use that to e. g. create buttons or show internal or external contents in a specific way.
I’ll demonstrate that by adding a simple web resource to the Case entity page.
1.
First I’ll add a nice icon to my work solution. For the demo, I’ll choose a 32 x 32 PNG icon:

and add it to web resources:

2.
I’ll also add the html/javascript content I want to display:
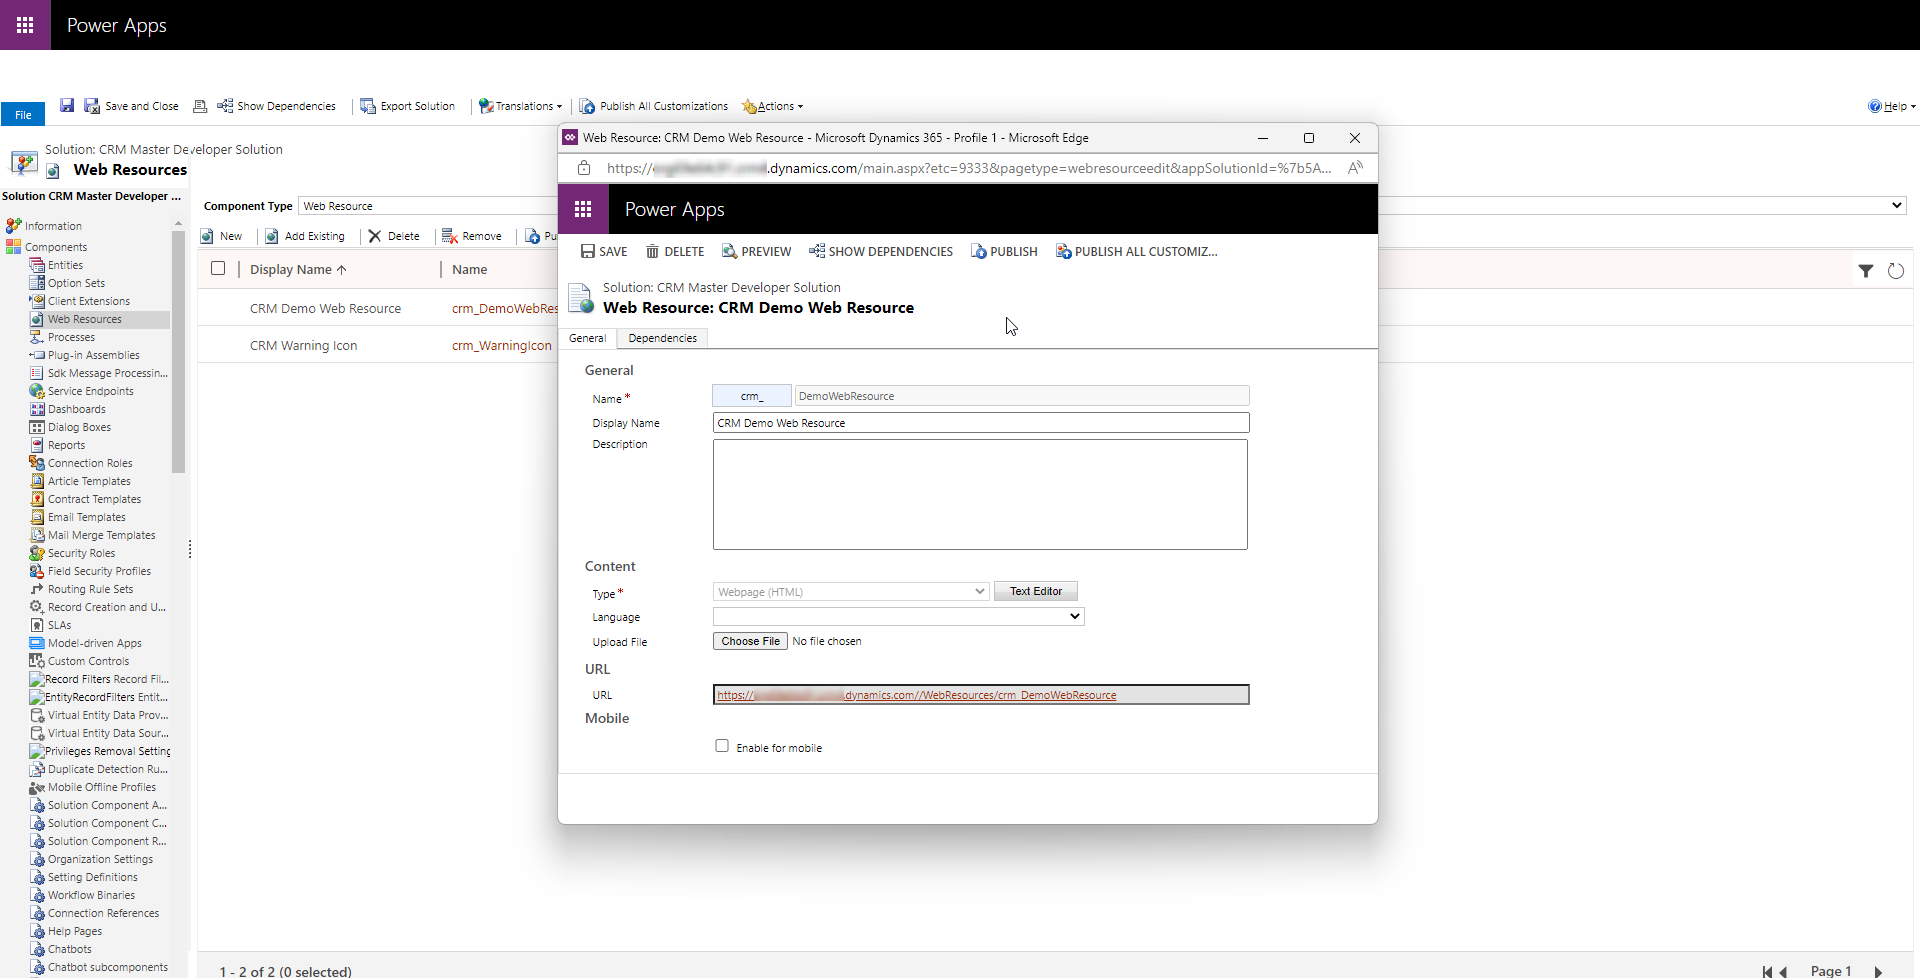
For this demo, I have chosen to do a simple html page with am icon (the one I uploaded in step 1), some text and a button:
<html><head>
<meta><meta><meta></head>
<body onfocusout="parent.setEmailRange();" style="overflow-wrap: break-word;">
<meta charset="utf-8">
<title>CRM Web Resource Demo</title>
<script>
function processButtonClick() {
alert("The case was processed!");
}
</script>
<style>
html {
height: 100%;
overflow: hidden;
font-size: 14px;
}
body {
height: 100%;
padding-left: 13px;
}
.sdk-sample-Dialog-Button {
width: auto;
height: 30px;
font-family: Segoe UI,Tahoma,Arial;
margin-top: 2px;
border: 1px solid rgb(59, 121, 183);
white-space: nowrap;
min-width: 50px;
background-image: none;
font-size: 14px;
color: rgb(59, 121, 183);
background-color: rgb(255, 255, 255);
cursor: pointer;
border-radius: 0px;
}
.sdk-sample-Dialog-ButtonDisabled {
border: 0px solid rgb(59, 121, 183);
background-color: rgb(239, 239, 239);
cursor: not-allowed;
border-radius: 0px;
}
.sdk-sample-Dialog-ButtonActive {
background-color: rgb(59, 121, 183);
color: #FFFFFF;
}
.sdk-sample-Dialog-ButtonActive:focus {
outline: 1px dotted #666666 !important;
}
.sdk-sample-Dialog-Button:hover {
color: rgb(255, 255, 255);
background-color: rgb(7, 96, 144);
}
.sdk-sample-Dialog-Button:focus {
outline: 1px dotted white !important;
}
</style>
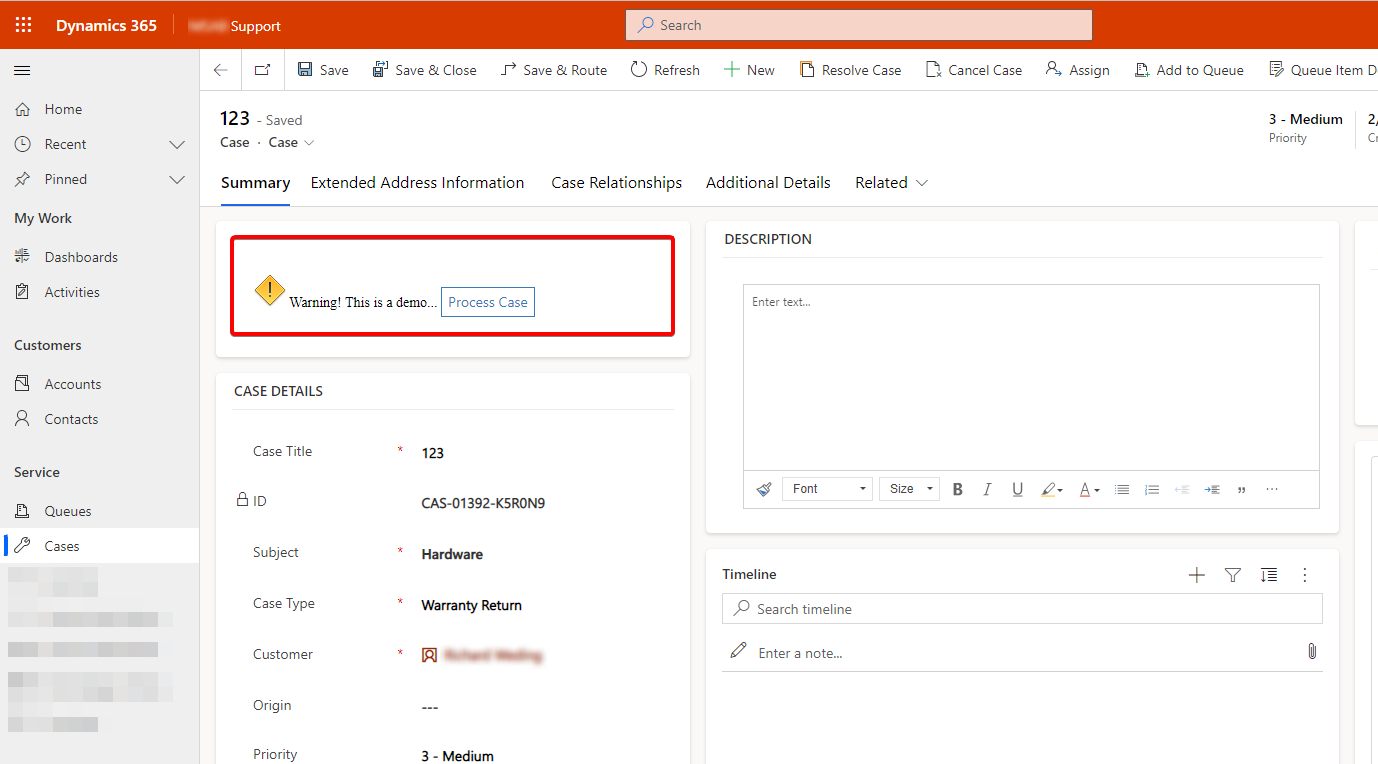
<p><img src="crm_warningicon" alt="Warning!" width="32" height="32"> Warning! This is a demo...
<button class="sdk-sample-Dialog-Button" id="demo" onclick="processButtonClick()">Process Case</button></p>
</body></html>
3.
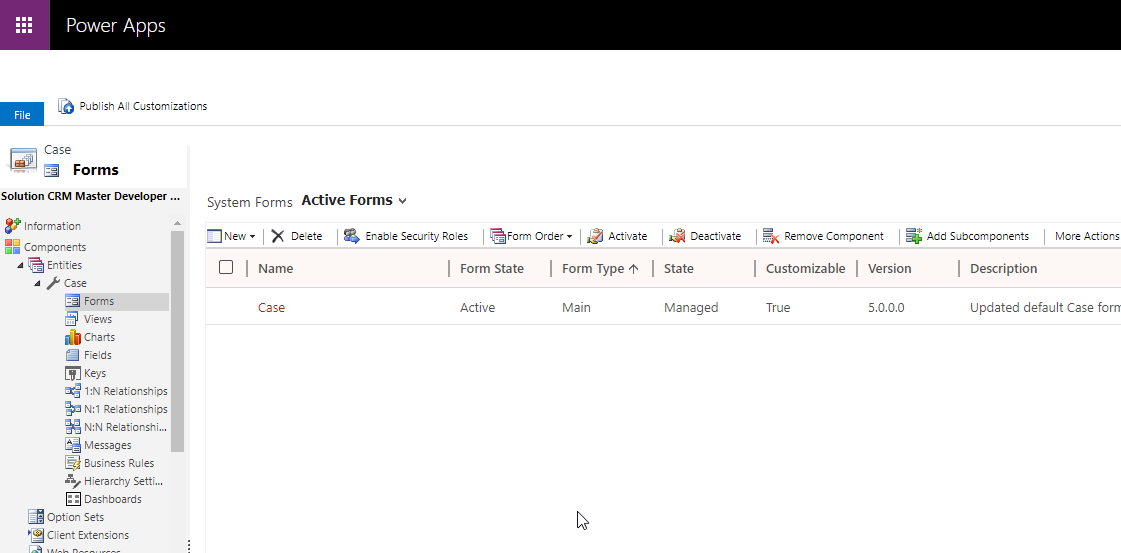
All I need to do now is add the form to which I want to add my Web Resource to my solution. In my selected case the Case entity main form:
4.
Open the form and create a new section for the Web Resource (or place it in an existing if you prefer that). Go to the Insert tab and select Web Resource:
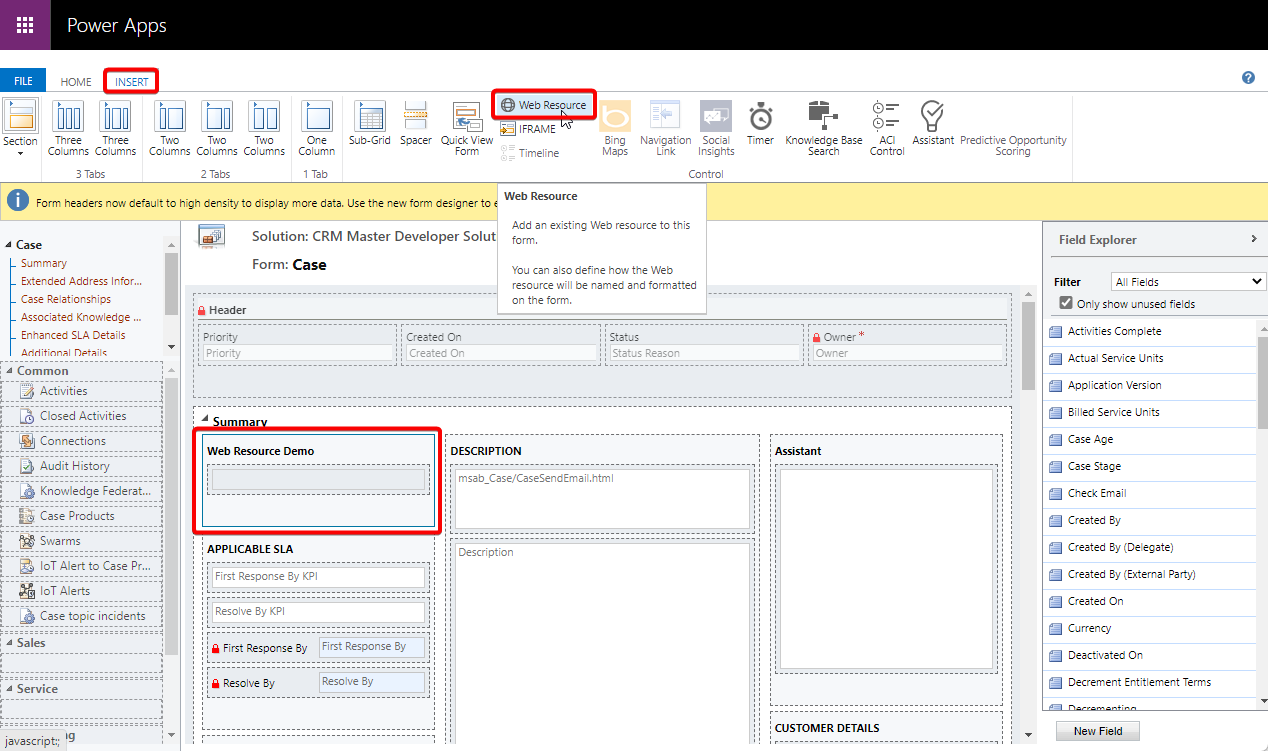
Add the newly created web resource and enter a Name and a Label:
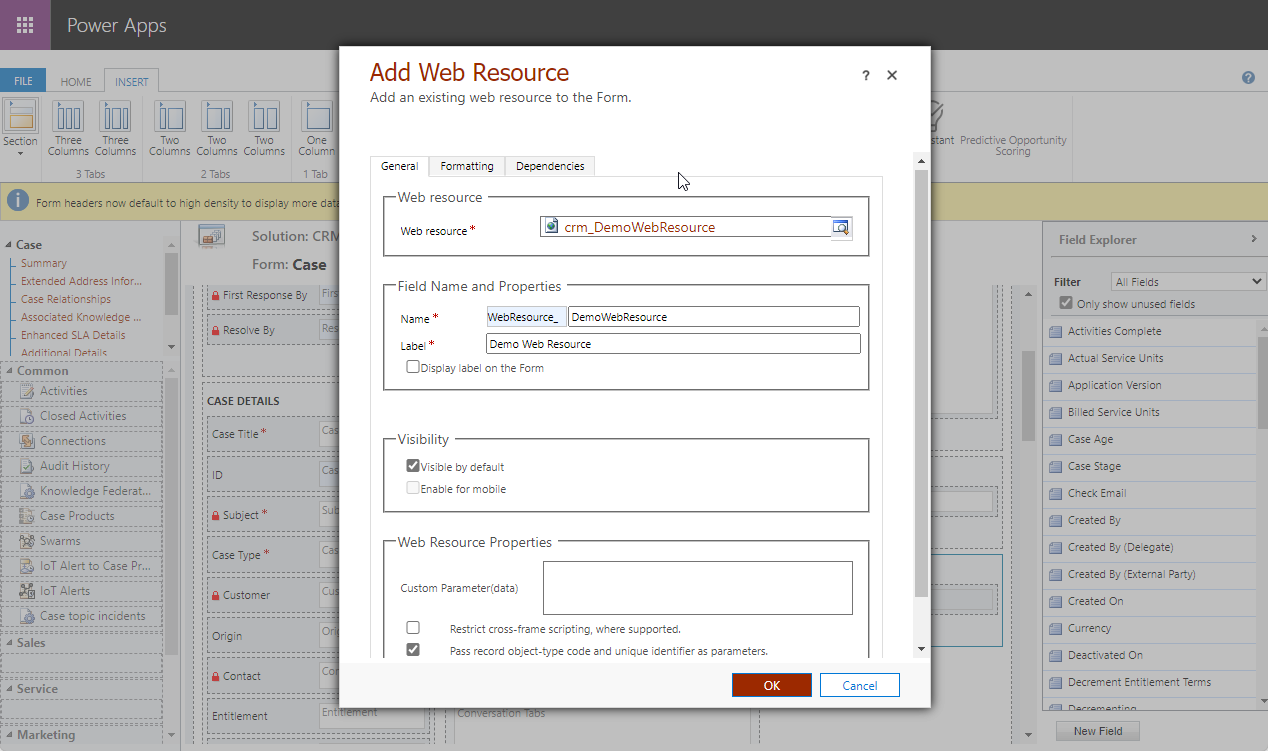
I’d also select “Pass record object-type code and unique identifier as parameters” – You will probably need that if you want to do a web resource that can actually do something…
You can adjust the height of your web resource by setting the Number of Rows property on the Formatting tab:
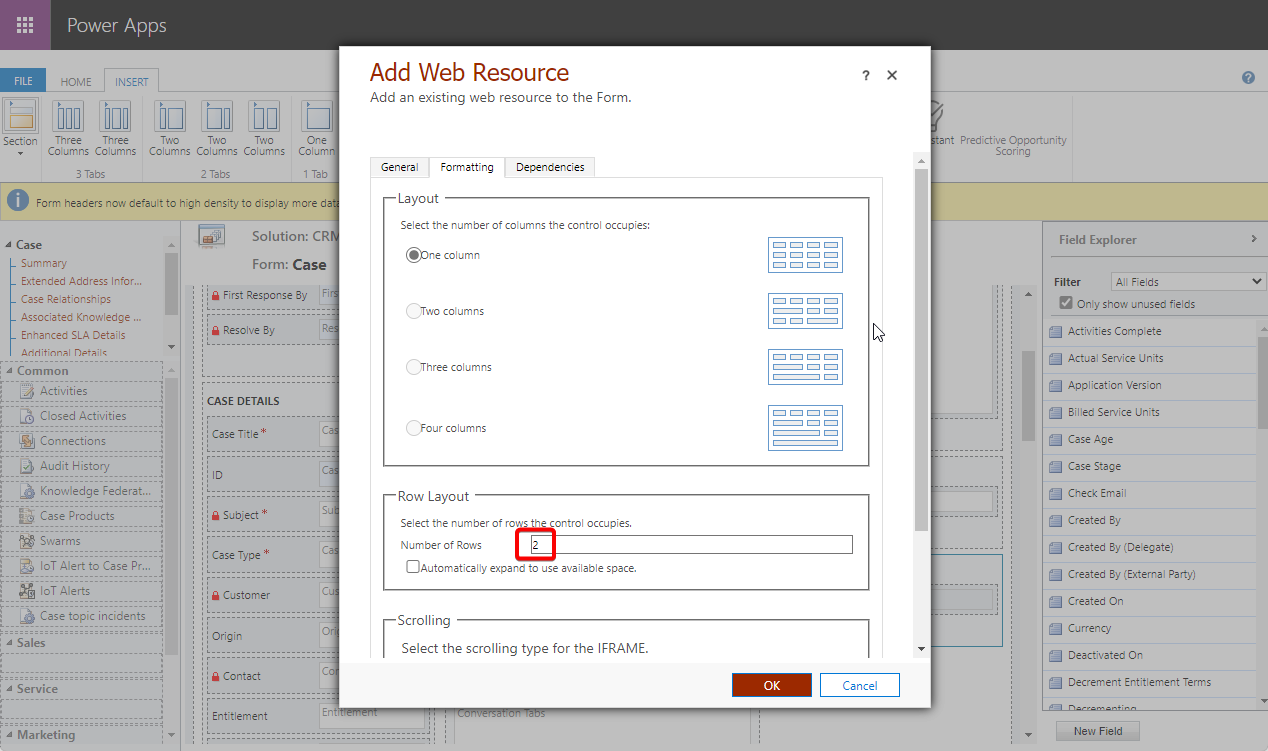
I’ll choose “2” because that will work well with this demo. I’ll also remove the “Display border” option a little further down on the Formatting tab.
Press OK to add the web resource, save your form and publish the changes.
5.
Now go to Microsoft 365 CRM and open any case. You will see your new web resource on the form where you put it:
You will probably know how to hide and show this based on some property on the Case. I’ll show you how to do that in another post. You can find it under the “Related posts”…